This blog post is a tutorial about how to set up a regular non-wireless printer as a Wi-Fi printer using a Raspberry Pi.
 Wirelessly print to your Brother HL-2240 laser printer using a Raspberry Pi
Table of Contents
- Our Printer Setup
- What are needed?
- Set up your Raspberry Pi first
- Write down your Raspberry Pi's IP address and hostname
- Update the Raspberry Pi OS
- Install CUPS, the print server
- Configure CUPS server
- CUPS Administration page
- Download printer driver
- Add the printer
- Test Print a page
- Install AirPrint
- Print from your mobile device or laptop wirelessly
- Conclusion
Our Printer Setup
We have a Brother HL-2240 monochrome laser printer which connects to computer via USB cable. This is a very useful black and white printer, lasted for several years, and we have printed thousands of pages from coupons to study sheets. Unfortunately, it does not have Wi-Fi capability. So a few years ago, we used our oldest Raspberry Pi version 1 to turn this Brother laser printer into a wireless printer.
What are needed?
You will obviously need your wired printer that connects via USB cable, and a Raspberry Pi. I am using the very first generation Raspberry Pi Model B, v1, that I bought in February 2012. Your Raspberry Pi should have the latest Raspberry Pi OS installed on it. You should note the IP address of the Raspberry Pi and assign it a static IP address from your router admin panel.
To convert your printer to a wireless printer, you have to set up your Raspberry Pi as an AirPrint server with Common UNIX Printing System (CUPS).
CUPS is a freely available, portable printing layer which is the standard for printing in most Linux distributions.
CUPS manages print jobs and queues and provides network printing using the standard Internet Printing Protocol (IPP), while offering support for a most printers. CUPS also includes a simple web-based configuration, management and administration tool.
AirPrint is a printing protocol designed by Apple so that their devices would not need to download or install drivers. Using AirPrint, you can create full-quality prints from your iPad, iPhone, MacBook and other Apple devices. This is a limited list of printers that already include AirPrint.
Set up your Raspberry Pi first
The first step is to set up your Raspberry Pi. Install the Raspberry Pi operating system (formerly known as Raspbian).
Write down your Raspberry Pi's IP address and hostname
In my case, the Raspberry Pi was assigned IP address of 192.168.1.100 and the hostname is printrpi.local.
Update the Raspberry Pi OS
Next, update the Raspberry Pi OS. Connect the Raspberry Pi to your printer via USB cable.
Update the software and libraries on the Raspberry Pi.
sudo apt update
sudo apt upgrade
Install CUPS, the print server
After the Raspberry Pi OS has been updated, install the print server, CUPS.
sudo apt install cups
Press y to continue. It will use about 35MB while installing.
...
Need to get 35.2 MB of archives.
After this operation, 127 MB of additional disk space will be used.
Do you want to continue? [Y/n] y
...
After installation, add the user pi to the lpadmin group.
sudo usermod -a -G lpadmin pi
Configure CUPS server
You will still not be able to access the CUPS web interface.
Now, enable access for the CUPS server via hostname and IP address.
Edit /etc/cups/cupsd.conf and look for these lines.
# Only listen for connections from the local machine.
Listen localhost:631
Listen /run/cups/cups.sock
Add the hostname like this:
# Only listen for connections from the local machine.
Listen localhost:631
Listen printrpi.local:631
Listen /run/cups/cups.sock
Save and exit the editor.
Restart CUPS.
sudo systemctl restart cups
CUPS Administration page
Try to access the Raspberry Pi using its IP address and port 631.
Here, the Raspberry Pi was assigned IP address of 192.168.1.100 and the hostname is printrpi.local.
Visiting http://printrpi.local:631 or http://192.168.1.100:631 took me to this page:
Forbidden

You cannot access this page.
If you get that error, edit /etc/cups/cupsd.conf and make a few changes.
Add this line below. Replace YOUR-EMAIL-ADDRESS with your real email address.
ServerAdmin YOUR-EMAIL-ADDRESS
Look for this block:
# Restrict access to the server...
<Location />
  Order allow,deny
</Location>
Add Allow all before </Location>.
# Restrict access to the server...
<Location />
  Order allow,deny
  Allow all
</Location>
Repeat this for the /admin location too.
Search for the location /admin block and add Allow all to it.
# Restrict access to the admin pages...
<Location /admin>
  Order allow,deny
  Allow all
</Location>
Restart the cups service:
sudo systemctl restart cups
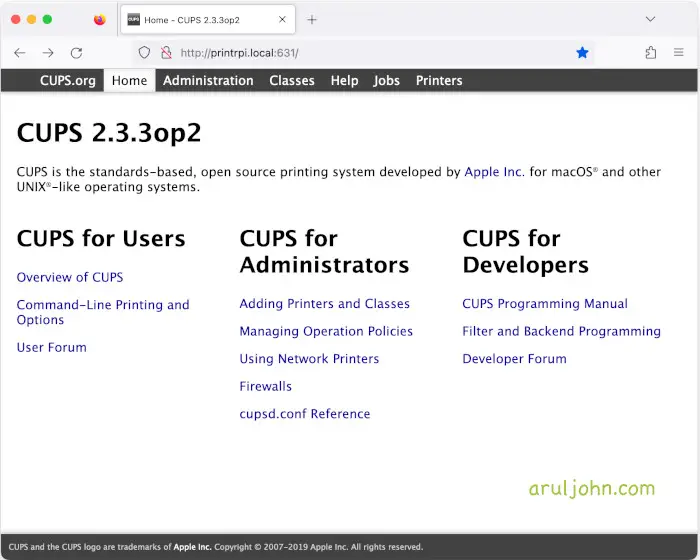 CUPS home page
Click on the Administration tab.
You should be able to see the admin page with printer section. There are no printers installed, yet.
Download printer driver
It will be a good idea to download the printer driver at this point.
You can download the Brother HL-2240 printer PPD file.
More information about the [Linux support for the Brother HL-2240 PPD file[(https://www.openprinting.org/printer/Brother/Brother-HL-2240).
It downloads as Brother-HL-2240-hl1250.ppd. Save it in a known location.
Add the printer
Click on Administration → Printers.
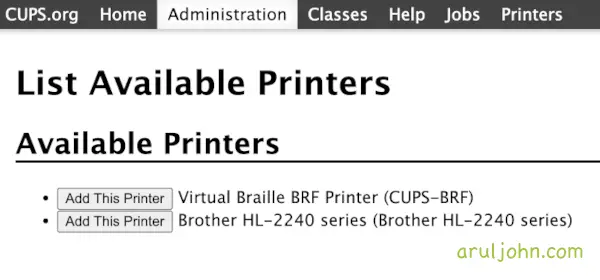 CUPS Printer Administration page
Click on Add This Printer button beside the Brother HL-2240 series label.
You will see this screen below:
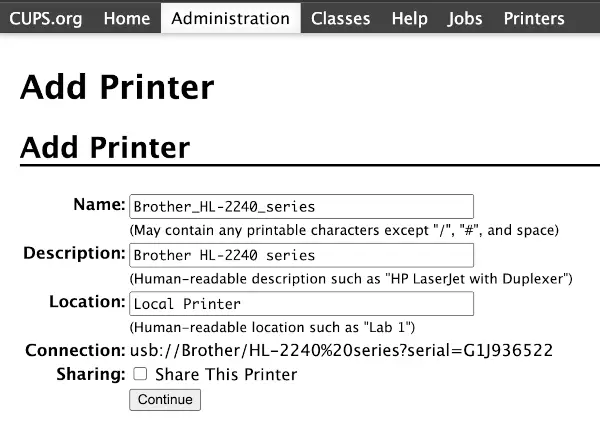
Click on Choose File and select the ppd file. You may set Make to Generic. The remaining fields may auto-populate or you can set them yourself.
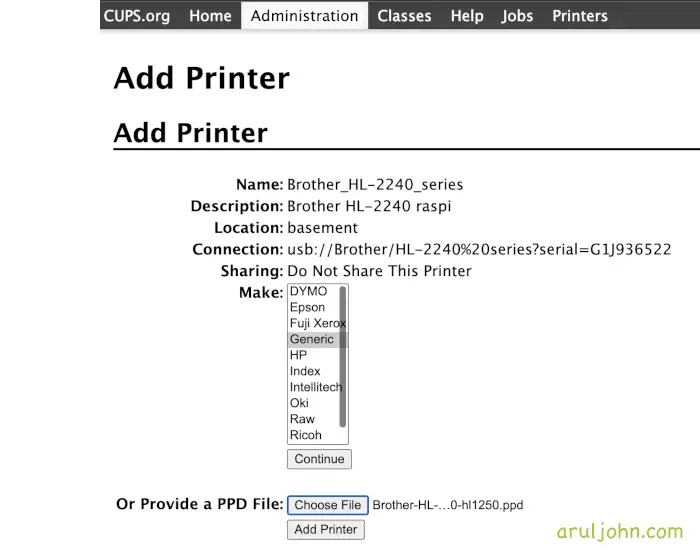
Now, click on the Add Printer button.
At this point, the printer driver would have been installed in your Raspberry Pi OS (Raspbian).
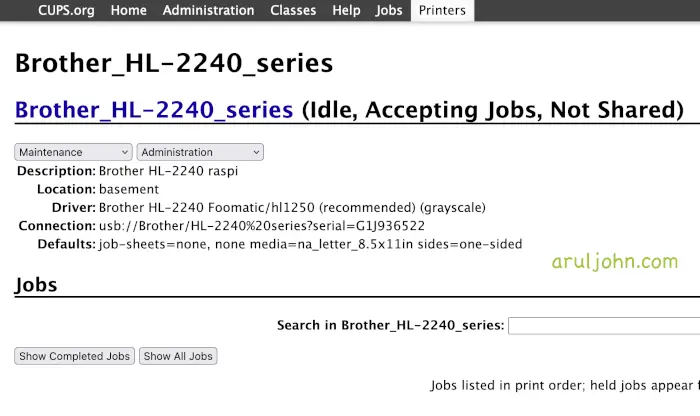
You can confirm it by clicking on the Printer tab.
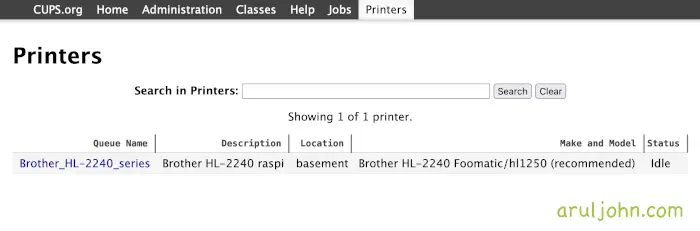
If you click on your printer name, it should show something like this:
Brother_HL-2240_series (Idle, Accepting Jobs, Not Shared)
Test Print a page
With the printer still connected to the Raspberry Pi, try to print a sample page.
You can directly print from the Raspberry Pi command line using this command. Just replace FILENAME with a real text file that exists.
lp FILENAME
Install AirPrint
Next, we will install AirPrint in our Raspberry Pi. Make sure that the Brother printer is still physically connected to the Raspberry Pi via USB.
Avahi implements Apple Zeroconf architecture to publish and discover services and hosts running on a local network. In Apple, this is Bonjour. When a user plugs a computer or printer into the network, Avahi automatically advertises the network services running on its machine.
Install the AirPrint Avahi daemon.
sudo apt install avahi-daemon
After installation of the avahi-daemon is complete, reboot your Raspberry Pi.
Print from your mobile device or laptop wirelessly
Now, try to print something from your iPhone or laptop wirelessly. The first time, you have to add the printer from Printers in your OS.
You will not have to install any drivers on the mobile device or laptop sending the file for printing.
Conclusion
This blog post was specifically for the Brother HL-2240 printer, but can work for most inkjet or laser printers in the market. If you have any problems configuring your printer or Raspberry Pi, feel free to contact us.
Related Posts
If you have any questions, please contact me at arulbOsutkNiqlzziyties@gNqmaizl.bkcom. You can also post questions in our Facebook group. Thank you.