Updated for Raspberry Pi OS with Debian bullseye (version 11)
This tutorial will show you how to install Raspberry Pi OS (former name: Raspbian) bullseye on a Raspberry Pi Zero W or Zero 2 W using the command line on a Mac. This is a headless install, meaning you do not need a monitor or keyboard connected to the Raspberry Pi Zero W to install the OS on the microSD card.
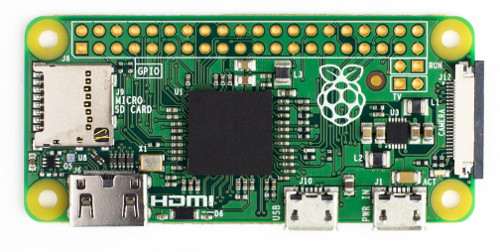
 Raspberry Pi Zero W
A Raspberry Pi Zero W has a built-in wifi and Bluetooth. There is no built-in storage, so you will have to use your own microSD card. Look for Class 10 cards with at least 8GB capacity, preferably a 16GB or 32GB microSD card. You will install Raspbian on the microSD card.
Is it Raspbian or Raspberry Pi OS?
The current name is Raspberry Pi OS. When this article was first written in May 2017, the operating system was called Raspbian. In May 2020, the operating system name changed from Raspbian to Raspberry Pi OS. During that time, the new 8GB Raspberry Pi 4 was released, and the Raspberry Pi Foundation announced that it was changing the name of its official operating system from Raspbian to Raspberry Pi OS.
What you will need
1) Raspberry Pi Zero W or Pi Zero W 2
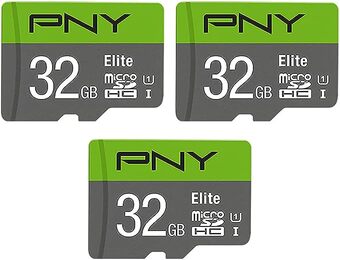
2) PNY card with at least 8GB. I love these 32GB PNY cards.
Optional
3) OTG cable, just in case you need to connect a USB keyboard
4) miniHDMI male to HDMI female
Download Raspberry Pi OS
The Raspberry Pi OS download page is here.
If you want the GUI version, click on the Download button beside the title that says Raspberry Pi OS with desktop and recommended software.
If you want the non-GUI text-based version, click on the Download button beside that title that says Raspberry Pi OS Lite.
This is a download link to the Raspberry Pi OS Lite (Debian 11 bullseye) image .xz file (last updated: May 3, 2023).
After downloading the zip file, unzip itx.
unxz 2023-05-03-raspios-bullseye-armhf-lite.img.xz
Your image file will be unzipped as a 1.9GB .img file 2023-05-03-raspios-bullseye-armhf-lite.img.
Create a directory ~/iso if it doesn't already exist. Move the Raspberry Pi OS Lite image file there.
Now, insert the microSD card into its adapter and into your computer. The card name show up on the desktop. My new PNY 32GB microSD card shows up as "NO NAME".
Write the image to the microSD card. If you want to do it using the command line, fire up Terminal if you're on a Mac or Linux.
Enter this to find the device list:
df -h
You will get something similar to this:
$ df -h
Filesystem                          Size   Used  Avail Capacity iused      ifree %iused  Mounted on
/dev/disk1                         465Gi  247Gi  218Gi    54% 1609478 4293357801    0%   /
devfs                              184Ki  184Ki    0Bi   100%     636          0  100%   /dev
map -hosts                           0Bi    0Bi    0Bi   100%       0          0  100%   /net
map auto_home                        0Bi    0Bi    0Bi   100%       0          0  100%   /home
localhost:/AB9NdpAfrugkKsX2qHKtPs  465Gi  465Gi    0Bi   100%       0          0  100%   /Volumes/MobileBackups
/dev/disk2s1                        14Gi  2.3Mi   14Gi     1%       0          0  100%   /Volumes/NO NAME
As you can see, the last line /dev/disk2s1 represents the microSD card. The card is mounted as disk2. Let us unmount it first.
sudo diskutil unmountDisk /dev/disk2s1
It will unmount the card. Now, write the image to the SD card. We will write the lite image. Make sure that you enter the of value to the right disk number, which in this case is disk2.
sudo dd bs=1M if=~/iso/2023-05-03-raspios-bullseye-armhf-lite.img of=/dev/rdisk2
You will see output similar to this:
1780+0 records in
1780+0 records out
1866465280 bytes transferred in 54.559682 secs (34209607 bytes/sec)
That means Raspberry Pi OS Lite non-GUI version is written successfully to your card.
If you do not want to enable SSH or wireless network, you may eject the card after issuing this command.
sudo diskutil eject /dev/rdisk2
The output will be this:
Disk /dev/rdisk2 ejected
Congratulations! You have installed Raspberry Pi OS successfully!
Enable SSH on the Raspberry Pi
If your card is still in the computer, go to the next step. If you have removed the card, put it back into the computer. When the computer recognizes the card, it will show up as boot.
Double-click on boot and create an empty file named ssh* in boot. If you want to use the command line to create an empty file, follow this step:
If you're using a Mac, type this:
echo '' > /Volumes/boot/ssh
You will see an empty file called ssh under the boot partition of the card. SSH will be enabled on the next boot.
Connecting the Raspberry Pi or Pi Zero W to the wireless network
Create a file called wpa_supplicant.conf under boot and enter the contents as follows:
country=us
update_config=1
ctrl_interface=/var/run/wpa_supplicant

network={
    ssid="YOUR-NETWORK-NAME"
    psk="YOUR-NETWORK-KEY"
    key_mgmt=WPA-PSK
}
You have to customize the above file using your credentials. Make sure the values for ssid, psk, key_mgmt are valid.
When everything is over, eject the card.
sudo diskutil eject /dev/rdisk2
Now, put the card in the Raspberry Pi and turn on the Raspberry Pi. It will hopefully connect to the wireless network. You can connect to it using this command.
ssh pi@raspberrypi.local
The default password is raspberry. After you login, be sure to change the password with a passwd command.
sudo raspi-config
In the Raspberry Pi configuration page, change the hostname and modify other settings according to what you want.
Related Posts
If you have any questions, please contact me at arulbOsutkNiqlzziyties@gNqmaizl.bkcom. You can also post questions in our Facebook group. Thank you.
