Table of Contents
- What is Pi-hole?
- Where can Pi-hole be used?
- Pi-hole is great for kids safety and protection
- Which computers and devices does the Pi-hole protect?
- My environment
- I used a Raspberry Pi 1 with 512MB RAM and a 16GB SD card
- Install DietPi
- Can you use Raspberry Pi OS Lite?
- Assign a static IP address to the Raspberry Pi
- Install Pi-hole on the Raspberry Pi (steps for DietPi)
- Configure Pi-hole upstream DNS provider
- Configure your Pi-hole IP address as the DNS
- Go to the Pi-hole Admin page and view Dashboard
- Verify the default Steven blocklist
- Publicly available DNS servers
- Conclusion
What is Pi-hole?
Pi-hole is an ad blocker that blocks ads at the DNS level. It works by intercepting DNS requests and blocking those that are known to serve ads, trackers, and other unwanted content. Pi-hole can be installed on a variety of platforms, including Raspberry Pi, which we will be talking about in this blog post.
Pi-hole 6 is the latest version. This tutorial takes you to the steps on how I installed Pi-Hole.
Where can Pi-hole be used?
There are lots of use cases for the Pi-hole. It is mainly meant for homes and small businesses. It is not designed to handle the scale of a large enterprise network. For large-scale deployments, consider using enterprise-grade solutions that are specifically designed to manage high traffic volumes and complex network architectures. I'm not aware of any enterprise-grade software for this.
Pi-hole is great for kids safety and protection
If you have younger kids and are worried about them seeing inappropriate ads on YouTube or webpages, Pi-hole can help block those ads. You can set up Pi-hole on your home network to filter out unwanted garbage content, including ads that may not be suitable for children. By configuring your router to use Pi-hole as the DNS server, all devices connected to your network will benefit from the ad-blocking. This way, you can create a safer online environment for your kids while they browse the internet or watch videos on YouTube.
Which computers and devices does the Pi-hole protect?
When you install Pi-hole on your Raspberry Pi and set it up as your network's DNS server, all DNS queries from devices on your network will be routed through Pi-hole. This allows Pi-hole to filter out unwanted content, such as ads and trackers, before they reach your devices. This ad blocking works across all devices connected to your network, including computers, smartphones, tablets, and smart TVs.
My environment
Okay, this is my environment. It should really work for any Raspberry Pi, even Pi Zero. Pi-Hole works on all Raspberry Pi devices.
- Raspberry Pi 1 with 512MB RAM
- 16GB SD card
- DietPi OS
- Pi-Hole 6
I used a Raspberry Pi 1 with 512MB RAM and a 16GB SD card
I resurrected my second oldest Raspberry Pi version 1 with 512MB RAM. I bought it in 2012 after buying the OG Raspberry Pi 1 with 256MB RAM.
This Raspi has a 16GB SD card. Yes, SD, not microSD.
Install DietPi
I installed DietPi on it to save on resources and install only what I needed. DietPi is known for its minimalistic approach, which allows it to use fewer resources compared to other operating systems. This is best for Raspberry Pi 1 and 3, both of which I have. It helps with more efficient use of processing power and memory.
You can install DietPi from the Raspberry Pi installer.
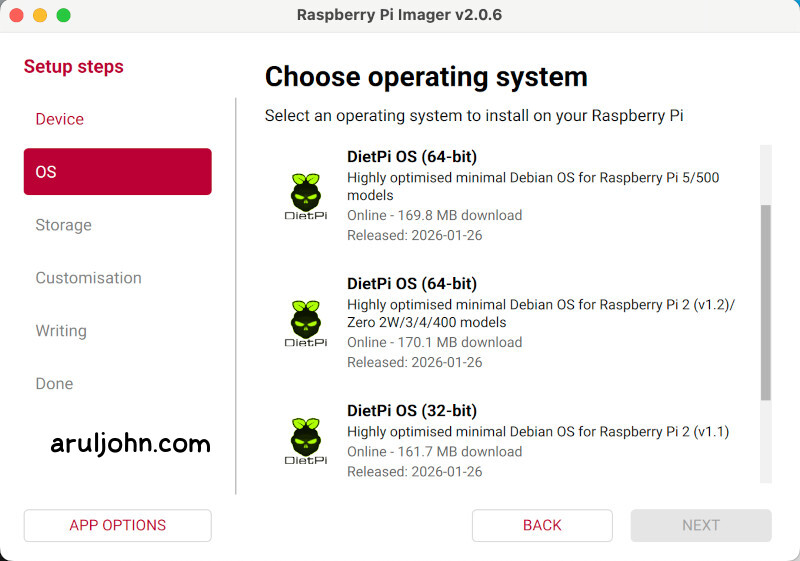
Use a blank 8GB or higher SD or microSD card and install DietPi on it.
I used a 16GB SD card. The installer erased the card and installed DietPi on it.
Can you use Raspberry Pi OS Lite?
Yes, of course. If you would like to install the official Raspberry Pi OS Lite, you can do that instead of DietPi.
Recenly, I found that some of my microSD cards in other Raspberry Pis 3B and older were getting corrupt. I suspect my Python programs ran for long periods of time over months and that led to resources that were not being freed. This was happening frequently on Raspberry Pi OS Lite.
I never had a problem with DietPi, so I personally prefer it. Your experiences may vary.
Assign a static IP address to the Raspberry Pi
I usually assign a static IP address to the Raspberry Pi in my router. I assigned the local IP address 192.168.1.102 to my Raspberry Pi running Pi-hole.
Install Pi-hole on the Raspberry Pi (steps for DietPi)
Pi-hole 6 is the latest version.
Assuming that you set up OpenSSH or Dropbear server to run on your Raspberry Pi, follow these steps to install Pi-hole.
I SSHed in to my Raspberry Pi running DietPi using the default Dropbear server.
ssh root@192.168.1.1
The default username / password for DietPi is root / dietpi
Next, start the dietpi software program. On the terminal, run this:
sudo dietpi-software
It will open this text-based program dietpi-software. Scroll down to Search Software.
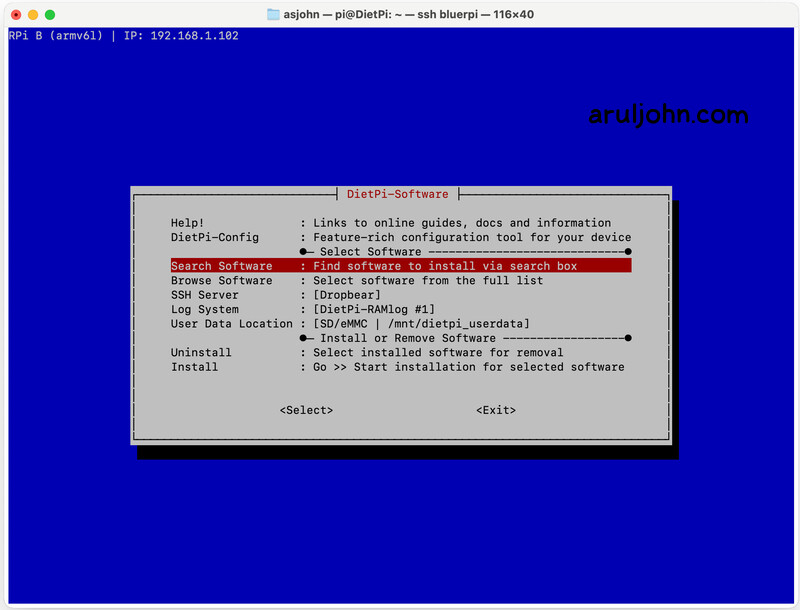
In the Search Software page, type for pi-hole and press Enter.

It will show you the Pi-hole option. Press Enter and allow it to Confirm.
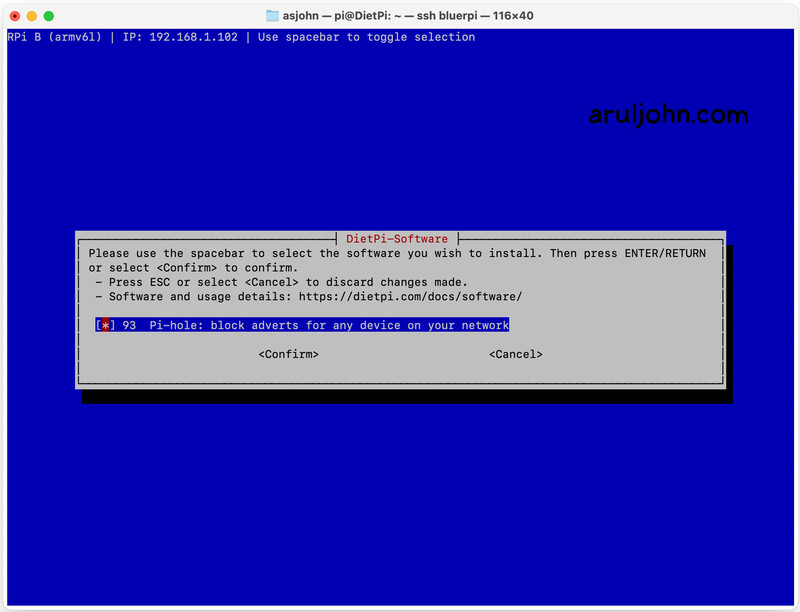
You will see this screen. Press Enter and allow to install.
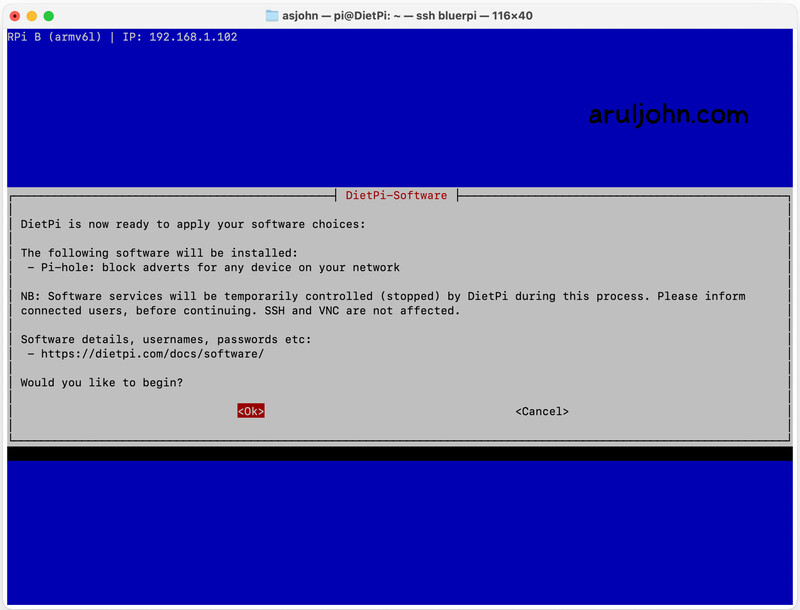
During installation, you will be prompted to install Ubound, a local DNS server. I refused.
You will also be prompted to set a password to acces the Pi-hole Admin page.
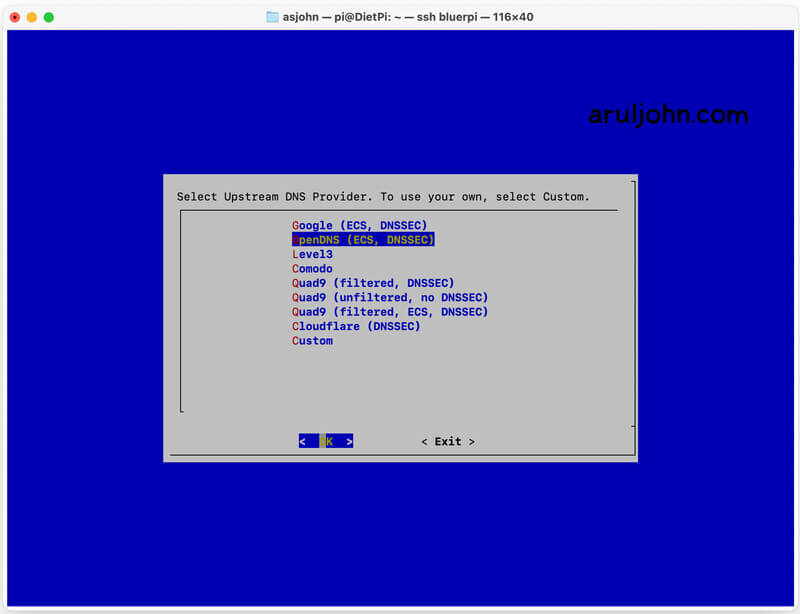
Configure Pi-hole upstream DNS provider
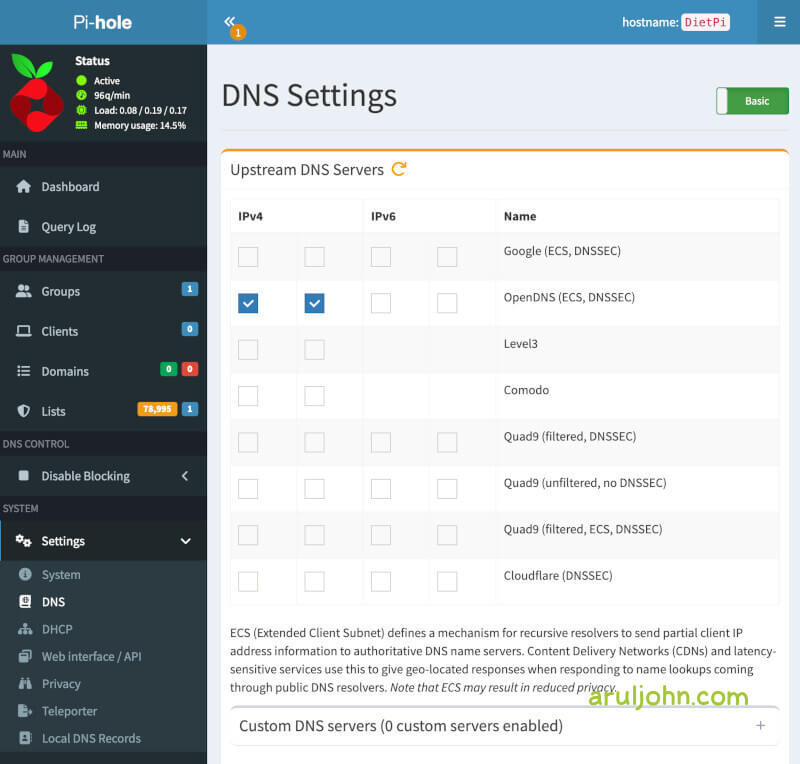
After installation, you will be prompted to select an upstream DNS provider. I love OpenDNS, so I selected it as my default DNS option so that all DNS queries will go through OpenDNS.
If you want to use another free public DNS server, here is a list of publicly available DNS servers.
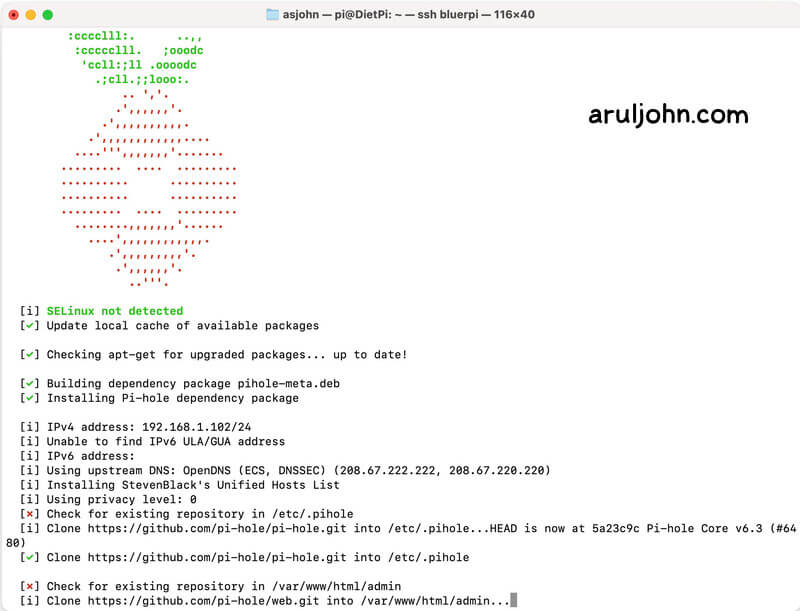
Once it is finished, Pi-hole is installed.
Configure your Pi-hole IP address as the DNS
Now, you have to configure your router and set the Raspberry Pi running Pi-hole as your DNS server.
In my case, I set 192.168.1.102 as the static IP address of my Raspberry Pi.
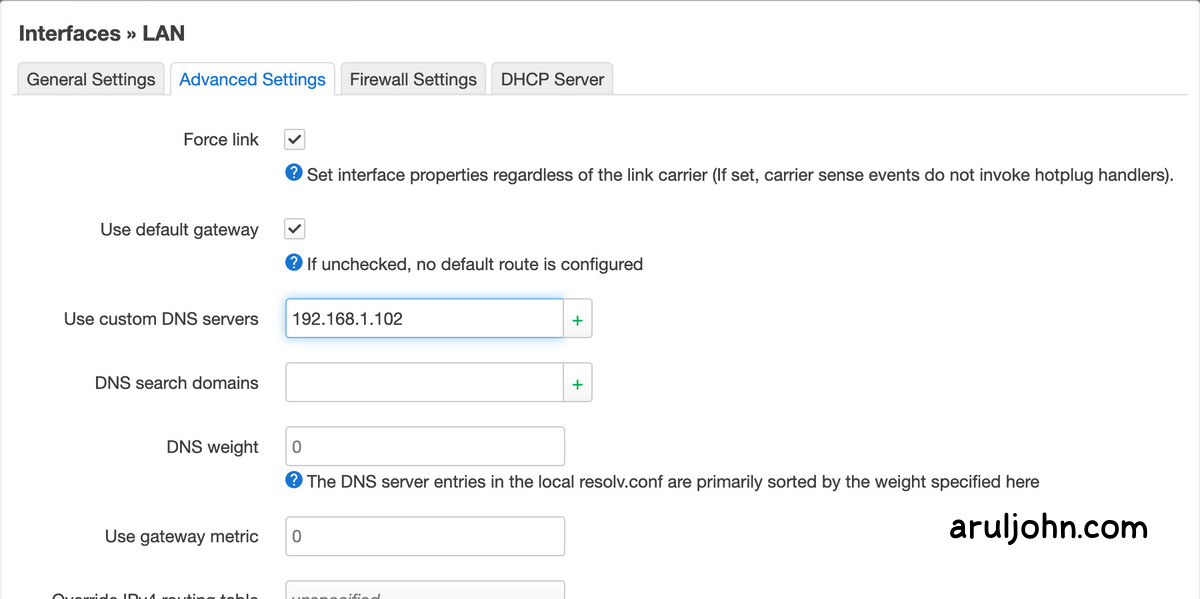
Option 1: Configure on OpenWRT Luci
If you are using OpenWRT Luci, you can set your DNS server IP address like this:
Option 2: Configure on your router
I have a GL.iNet Flint 2 router, which runs a modified version of OpenWRT.
To configure the DNS servers to point to the Raspberry Pi running Pi-hole, followed by backup OpenDNS DNS IP addresses, this is how I do it.
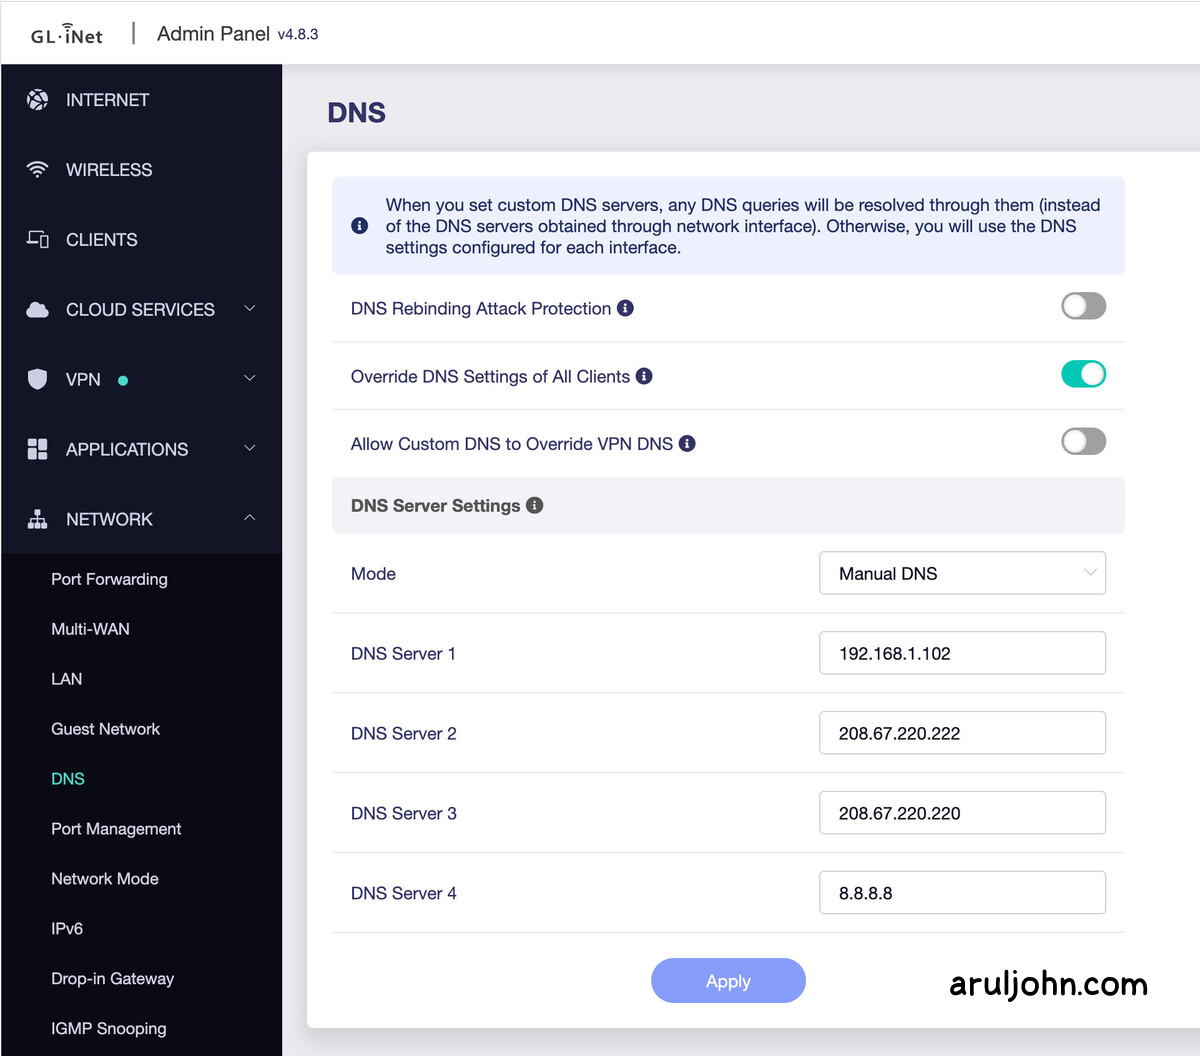
Your screen may be different from mine. But what you have to do is in the first DNS Server field, put the IP address of the Raspberry Pi router. In the following boxes, you can put the IP addresses of OpenDNS servers and maybe Google server 8.8.8.8 as well, as fallback.
If you want, you can check this list of family-friendly DNS providers apart from OpenDNS and Google.
Go to the Pi-hole Admin page and view Dashboard
To view the admin page, you already know the LAN IP address. You will have to use the port 8489 and endpoint /admin/ to access it.
Since my Raspberry Pi's IP address is 192.168.1.102, I access Pi-hole admin page with:
https://192.168.1.102:8489/admin/
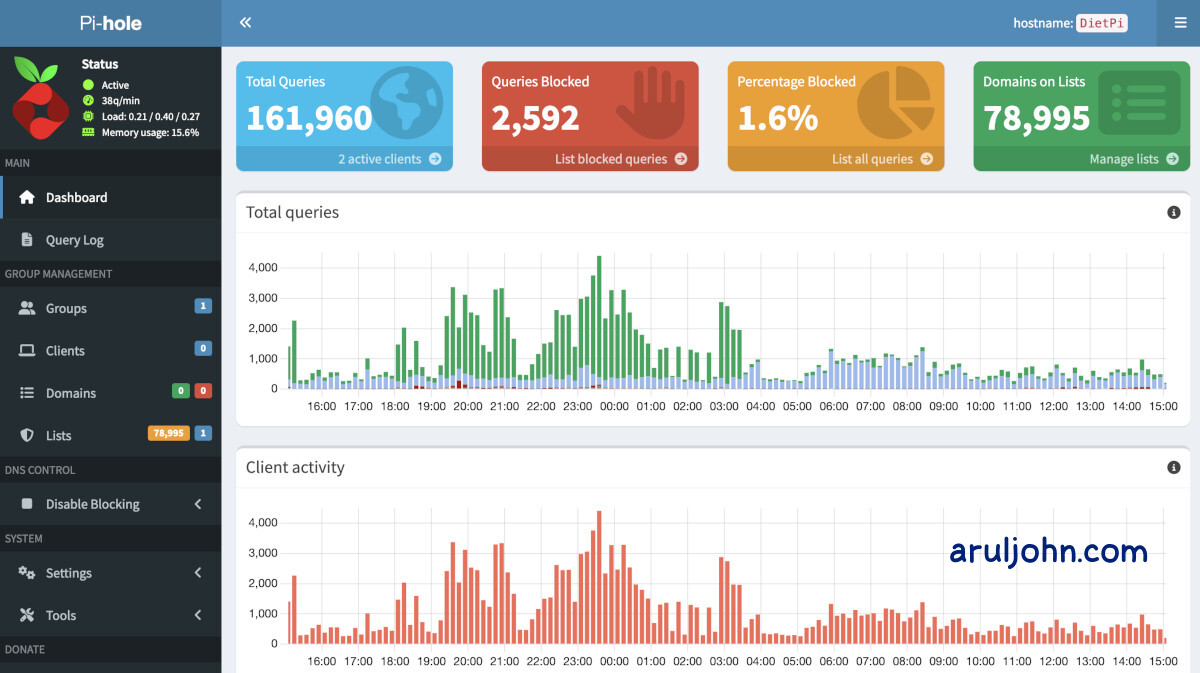
It prompts me for the password. I enter the Pi-hole password and see the Dashboard.
After less than 24 hours after installation, I have this.
Verify the default Steven blocklist
On the top-right, you will notice Domains on Lists at around 79,000. By default, Steven's blocklist of 79,000 domains is included by default.
Click on Manage Lists. You will be taken to the Subscribed lists group management page. You can always add, delete or disable lists here.
Publicly available DNS servers
This is a list of more DNS providers, most of which are family-friendly, safe and free. You do not have to use only OpenDNS or Google. The configuration for DNS server setting will be made in your Pi-hole admin.
| DNS Provider | Primary DNS | Secondary DNS |
|---|---|---|
| OpenDNS | 208.67.222.222 | 208.67.220.220 |
| 8.8.8.8 | 8.8.4.4 | |
| Cloudflare | 1.1.1.1 | 1.0.0.1 |
| Quad9 | 9.9.9.9 | 149.112.112.112 |
| Comodo Secure DNS | 8.26.56.26 | 8.20.247.20 |
| CleanBrowsing Family Filter |
185.228.168.168 | 185.228.169.169 |
| CleanBrowsing Adult Filter |
185.228.168.10 | 185.228.169.11 |
| CleanBrowsing Security Filter |
185.228.168.9 | 185.228.169.10 |
| Control D | 76.76.2.0 | 76.76.10.0 |
| AdGuard DNS Default Filter |
94.140.14.14 | 94.140.15.15 |
| AdGuard DNS Family Protection |
94.140.14.15 | 94.140.15.16 |
To change the DNS server, login to the Pi-hole Admin section, and on the left panel, click on Settings, then DNS. You will see the DNS Settings page.
Conclusion
This blog post was notes about how I installed Pi-hole in my Raspberry Pi running DietPi. I will update this frequently with new Q & A and problems with solutions. Also, look forward to more blog posts related to Pi-hole. Thanks for reading.
Related Posts
If you have any questions, please contact me at arulbOsutkNiqlzziyties@gNqmaizl.bkcom. You can also post questions in our Facebook group. Thank you.