This is a blog post on how to set up web controllable Christmas lights. You can change our Christmas lights at https://aruljohn.com/christmas/. We used SMS 5050 5 meter long RGB strip lights.
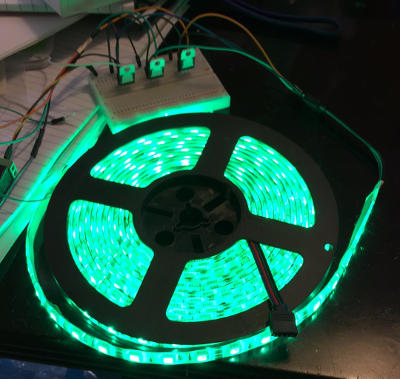
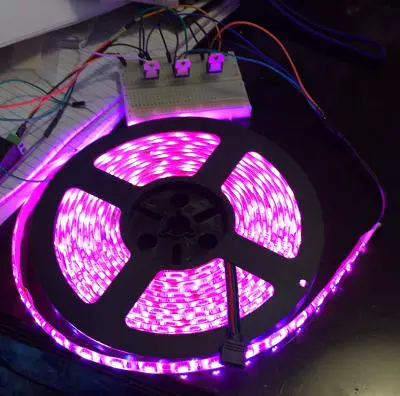
I've wanted to set up our own web controllable Christmas lights using our Raspberry Pi since 2012. And we finally did it. We used a 5 meter RGB LED strip (analog).
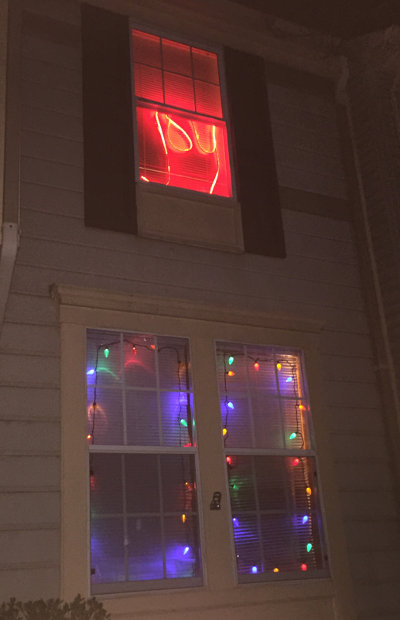
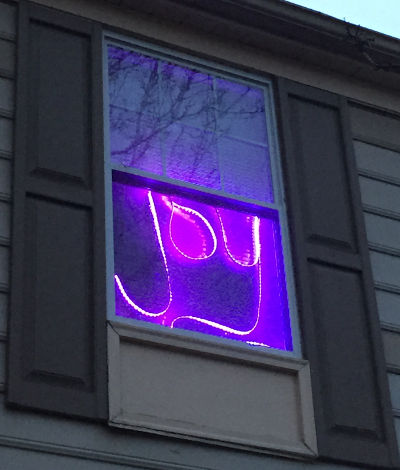
This is what our lights look like - the word JOY. You can also watch a demo video here.
 Web Controllable Lights, up and running since 2013
What you need:
- Raspberry Pi Model B version 1: Bought it from MCM Electronics in February 2012 {pre-ordered}. Cost: $40.
- RGB LED Strip, 5 meters, with 12V power supply: Bought it from Amazon. Cost: $25.
- Female-Female jumper wires: Bought them from MCM, but they cost lesser from Amazon.
- Male-Male jumper wires: Bought them from MCM, but they cost lesser from Amazon.
- Half Breadboard: Bought this from Adafruit. Cost: $5.
- Male DC Power adapter: Bought this from Adafruit. Cost: $2.
- Three MOSFET Transistors TO-220 (MOSFET N-Channel 60V 16A): Bought them from digikey.com. Cost: $0.95 each.
- Sticky tape: Bought this from Staples. Used for securing the LED strip light on the window.
If your analog RGB LED strip does not come with a power supply, buy a 12V power supply because the Raspberry Pi cannot power it from its GPIO.
There are different N-Channel MOSFET transistors out there, but this TO-220 was recommended because at 5 meters and 300 LEDs, the resistance would be 1 Amp per transistor. These can handle up to 16 Amps of continuous current.
Schematic Design and Connections
Use my Fritzing schematic for reference.
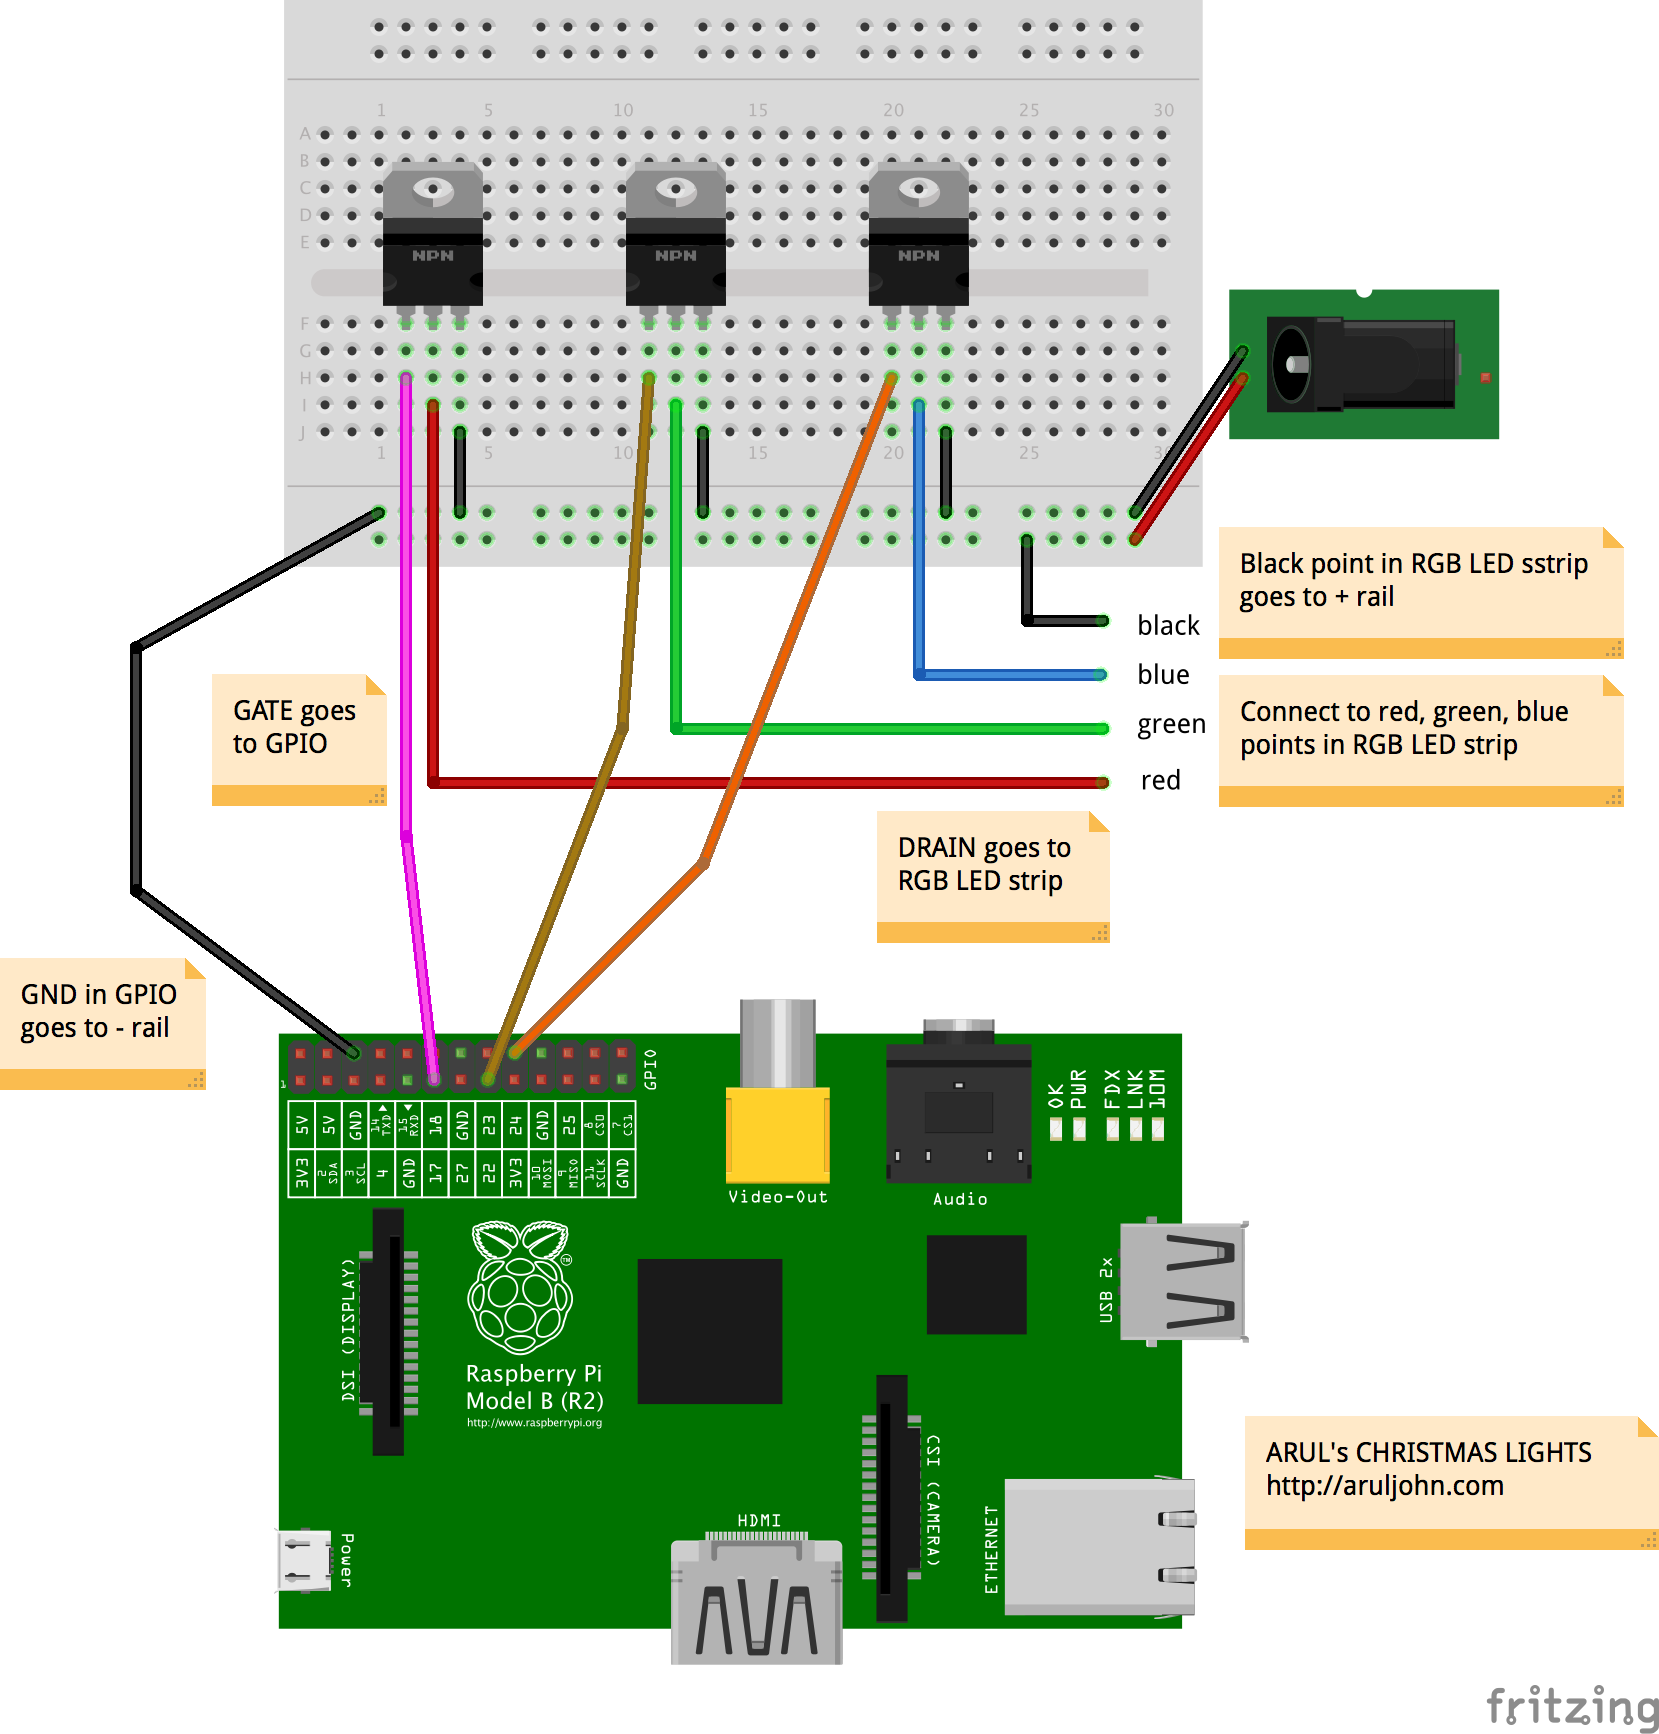 Fritzing schematic design
Begin with a blank half breadboard. The MOSFET transistor has from left to right, pins referred to as Gate, Drain and Source. Stick the MOSFETs into the breadboard.
Connect the MOSFET Source pins to the negative rail of the breadboard.
Connect the first MOSFET Drain pin to the red colour of the RGB LED strip, the second MOSFET Drain pin to the green colour of the strip and the third to the blue colour of the strip. Connect the black colour of the strip to the positive rail of the breadboard.
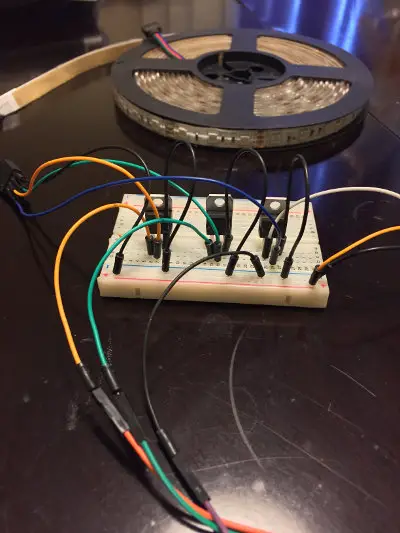 Connecting the cables to MOSFETs
We need to connect the GPIO pins. We will use GPIO 17 for red, GPIO 18 for green, GPIO 22 for blue. Connect the first MOSFET Gate pin to GPIO 17, the second MOSFET Gate pin to GPIO 18 and third MOSFET Gate pin to GPIO 22. Connect GND to the negative rail of the breadboard.
 Connecting the cables to GPIO pins
Connect the DC power jack to the negative and positive rails of the breadboard. The other end of the jack goes into the 12V power adapter.
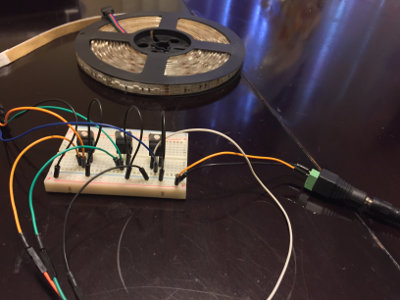 Connecting the DC power jack
Double-check your connections, and then test the LED strip with the Raspberry Pi. We'll use pi-blaster to enable PWM pins on the GPIO pins.
Software Setup with the Raspberry Pi
If you've not already installed pi-blaster, here are steps to install:
- Login to your Raspberry Pi.
- Run this:
sudo apt-get install autoconf
sudo apt-get install git
git clone https://github.com/sarfata/pi-blaster
cd pi-blaster
./autogen.sh
./configure
make
sudo make install
To test pi-blaster and get green on, remember green is GPIO 18.
echo "18=1" > /dev/pi-blaster
To get purple (blue+red), enable blue (GPIO 18) and red (GPIO 17).
echo "18=1" > /dev/pi-blaster
echo "17=1" > /dev/pi-blaster
And, you'll get purple.
To add one of more colours with varying percentage, change the value of PWM, like this:
echo "22=1" > /dev/pi-blaster
echo "17=0.5" > /dev/pi-blaster
You could end up with violet (more blue, less red).
To turn off GPIO 17, this is what you'd do:
echo "release 17" > /dev/pi-blaster
Python script to set colour to purple-ish:
import os

os.system('echo 17=1 > /dev/pi-blaster')
os.system('echo 18=0.5 > /dev/pi-blaster')
os.system('echo 22=0.5 > /dev/pi-blaster')
Python script to set the colour to black / no colour:
import os

os.system('echo 17=0 > /dev/pi-blaster')
os.system('echo 18=0 > /dev/pi-blaster')
os.system('echo 22=0 > /dev/pi-blaster')
If everything works fine and the LED strip glows up correctly, let's move on to the web part.
Creating the Web Application
I ~have~ had a simple webpage at https://arul.mobi/christmas/ that receives all the web requests and sends JSON requests to a Python Flask application running on Raspberry Pi, sitting at home.
This is the flow:
User ☃ -> {user-facing webpage} https://aruljohn.com/christmas -> {back-end web service} raspberry pi
This is sample code for the user-facing webpage.
This is sample code for the Python Flask app running on the Raspberry Pi.
You can get the whole code on my Github account:
https://github.com/aruljohn/RaspberryPi-Christmas-Lights-RGB-LED
Arrange the LED strip in your design
When everything is done, arrange the LED strip in any design you want. The strip is quite flexible, but don't force it to bend too much. There are ways to cut the strip and reconnect using cables (and a little soldering), but that's not covered in this post.
My wife designed the LED strip as the word JOY. This is what it looked like.
Demonstration Video
Questions
- Colours don't display exactly as the colour hex code
Yes, that happens with the cheap analog RGB LED strip. Depending on quality of the RGB LED strip, you may find #a4c639 showing the same colour as #a8d7e9.
- How do I get the lights fade individually or colour individually?
You'll need a digital RGB LED strip to individually address each LED. Look in Adafruit. Be warned that they are far more expensive than the analog RGB LED strip.
- What if I want to light up multiple 5m LED strips?
The easiest way is to get a 16-Channel 12-bit PWM/Servo Driver (PCA9685) board from Adafruit. you can control up to 16 PWM outputs.
References: Most of the hardware information here is from RaspberryPi.org forum, Adafruit and StackOverflow.
Related Posts
If you have any questions, please contact me at arulbOsutkNiqlzziyties@gNqmaizl.bkcom. You can also post questions in our Facebook group. Thank you.